Network Connection
The ORB can communicate with the Senquip Portal or a remote server via Wi-Fi or 4G LTE. Where both Wi-Fi and 4G LTE networks are selected, the ORB will first attempt to connect via Wi-Fi and if that is unsuccessful, the ORB will then attempt to connect via 4G LTE. In the event that neither Wi-Fi or 4G LTE networks can be found, the ORB can be set to log data to internal memory and then upload it when a network becomes available (see Endpoint settings).
Wi-Fi Specification
Wi-Fi on the ORB is used to transmit data, to allow settings to be remotely updated, to allow in-field software updates and also to enable setup via an integrated web-server that can be accessed in setup mode via a mobile phone or other Wi-Fi device.
The ORB Wi-Fi implementation supports Wi-Fi 802.11 b/g/n. The Wi-Fi antenna is integrated into the ORB. In typical applications, the range achievable with Wi-Fi is 500m.
4G LTE Specification
4G LTE on the ORB is used to transmit data, to allow settings to be remotely updated and to allow in-field software updates.
The ORB 4G LTE implementation is designed for global use and supports Cat-M1 and CAT-1 in the following bands:
Device |
LTE Category |
Bands |
|---|---|---|
ORB-xx-G |
CAT-M1 EGPRS |
B1/B2/B3/B4/B5/B8/B12/B13/B18/B19/B20/B26/B28/B39 850/900/1800/1900MHz |
ORB-xx-H |
CAT-1 GSM / EDGE |
B1/B3/B7/B8/B20/B28 B3/B8 |
The 4G LTE antenna is integrated into the ORB.
Connecting to a Wi-Fi Network
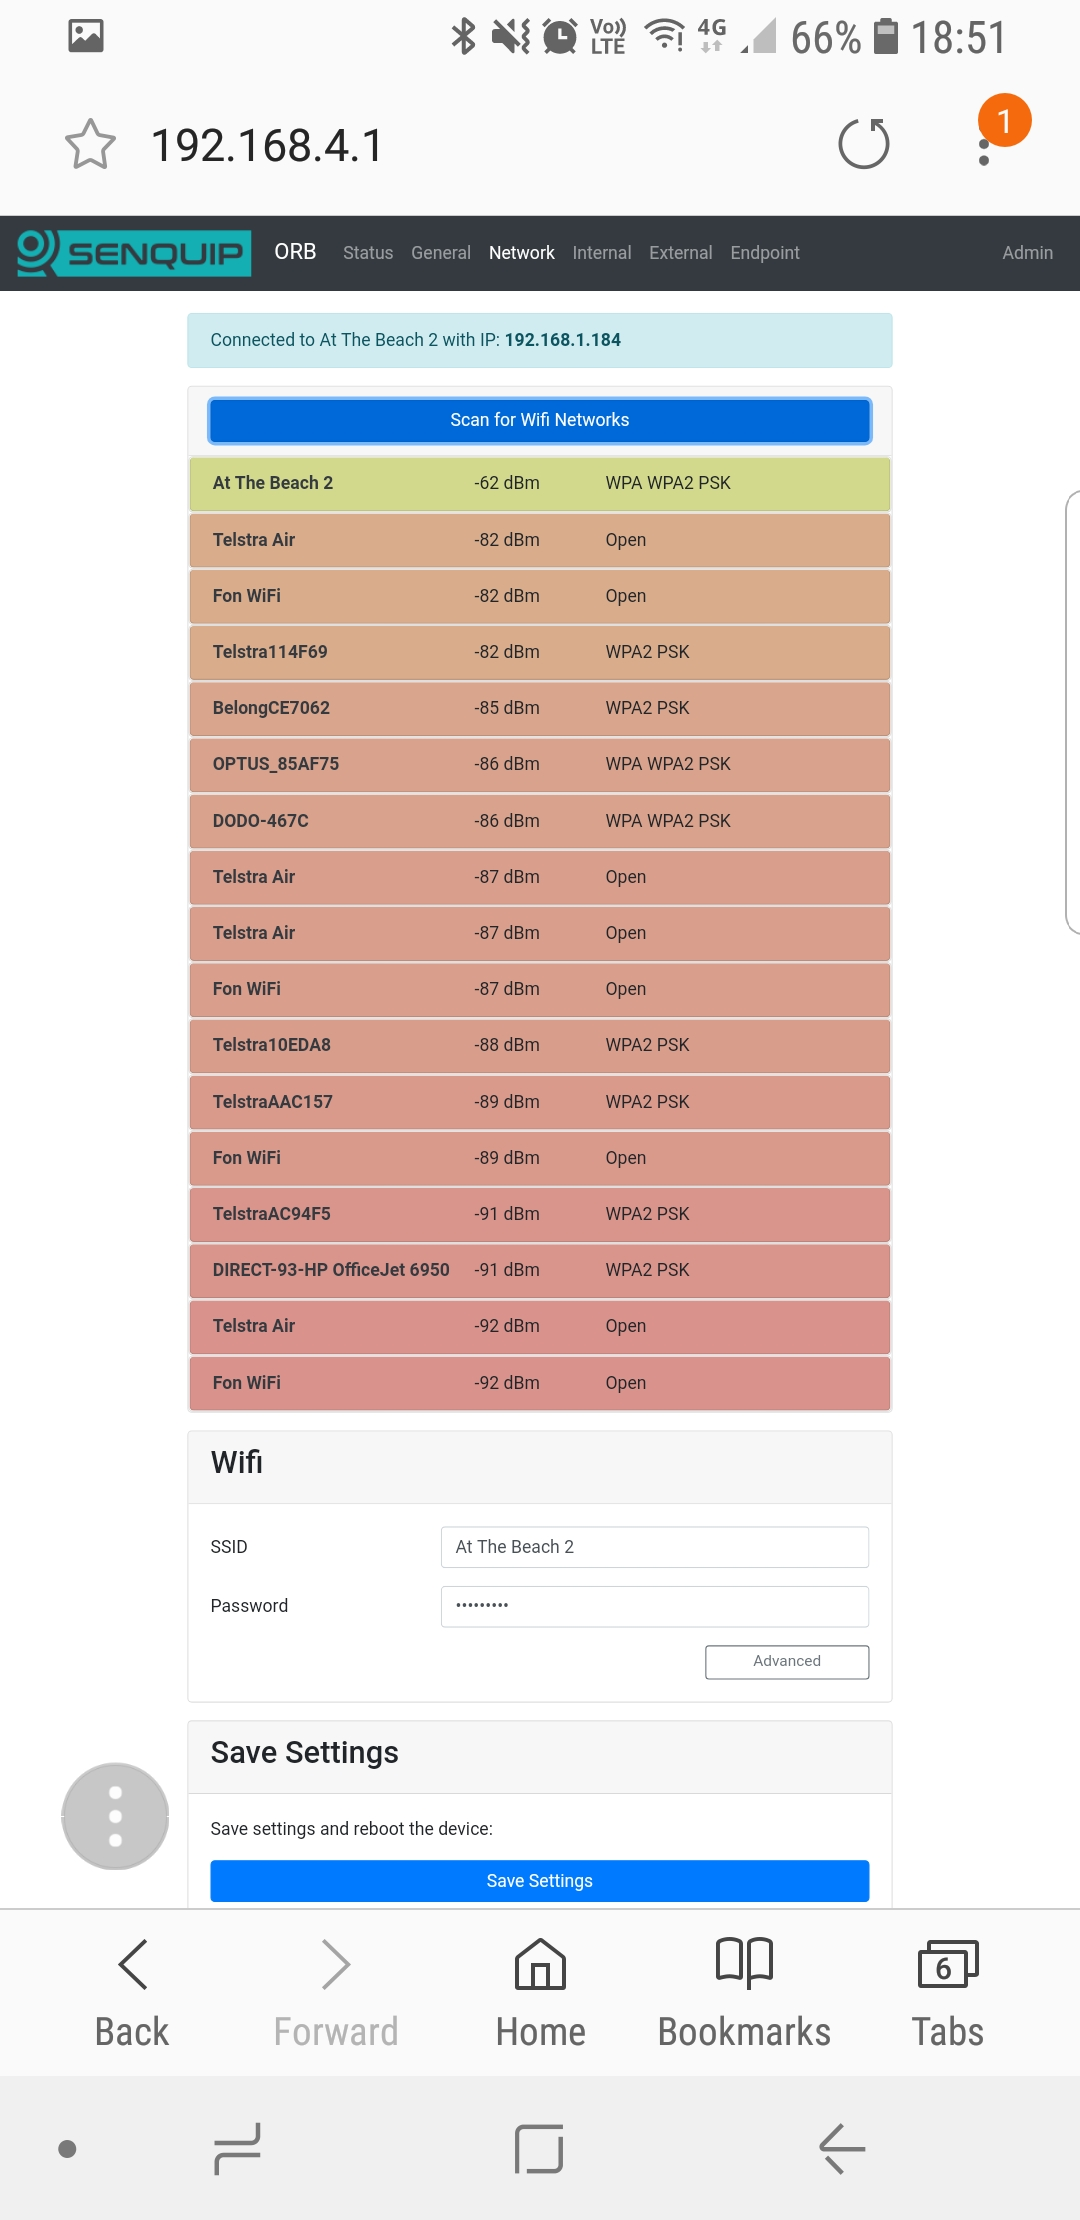
Once in setup mode, use the Network page to connect the ORB to a Wi-Fi network.
On the Network page, press the Scan for Wi-Fi Networks button. After a few seconds, a list of SSIDs for visible Wi-Fi networks will be shown. Select the Wi-Fi network to which you would like to connect by selecting the SSID from the list. The SSID will automatically be copied to the Wi-Fi SSID field and you will be prompted for the network password. After entering the password, press Save Settings. You will be prompted to restart the device; settings will only be applied after a restart. To continue with setup, press CANCEL or to restart and apply your settings, press OK.
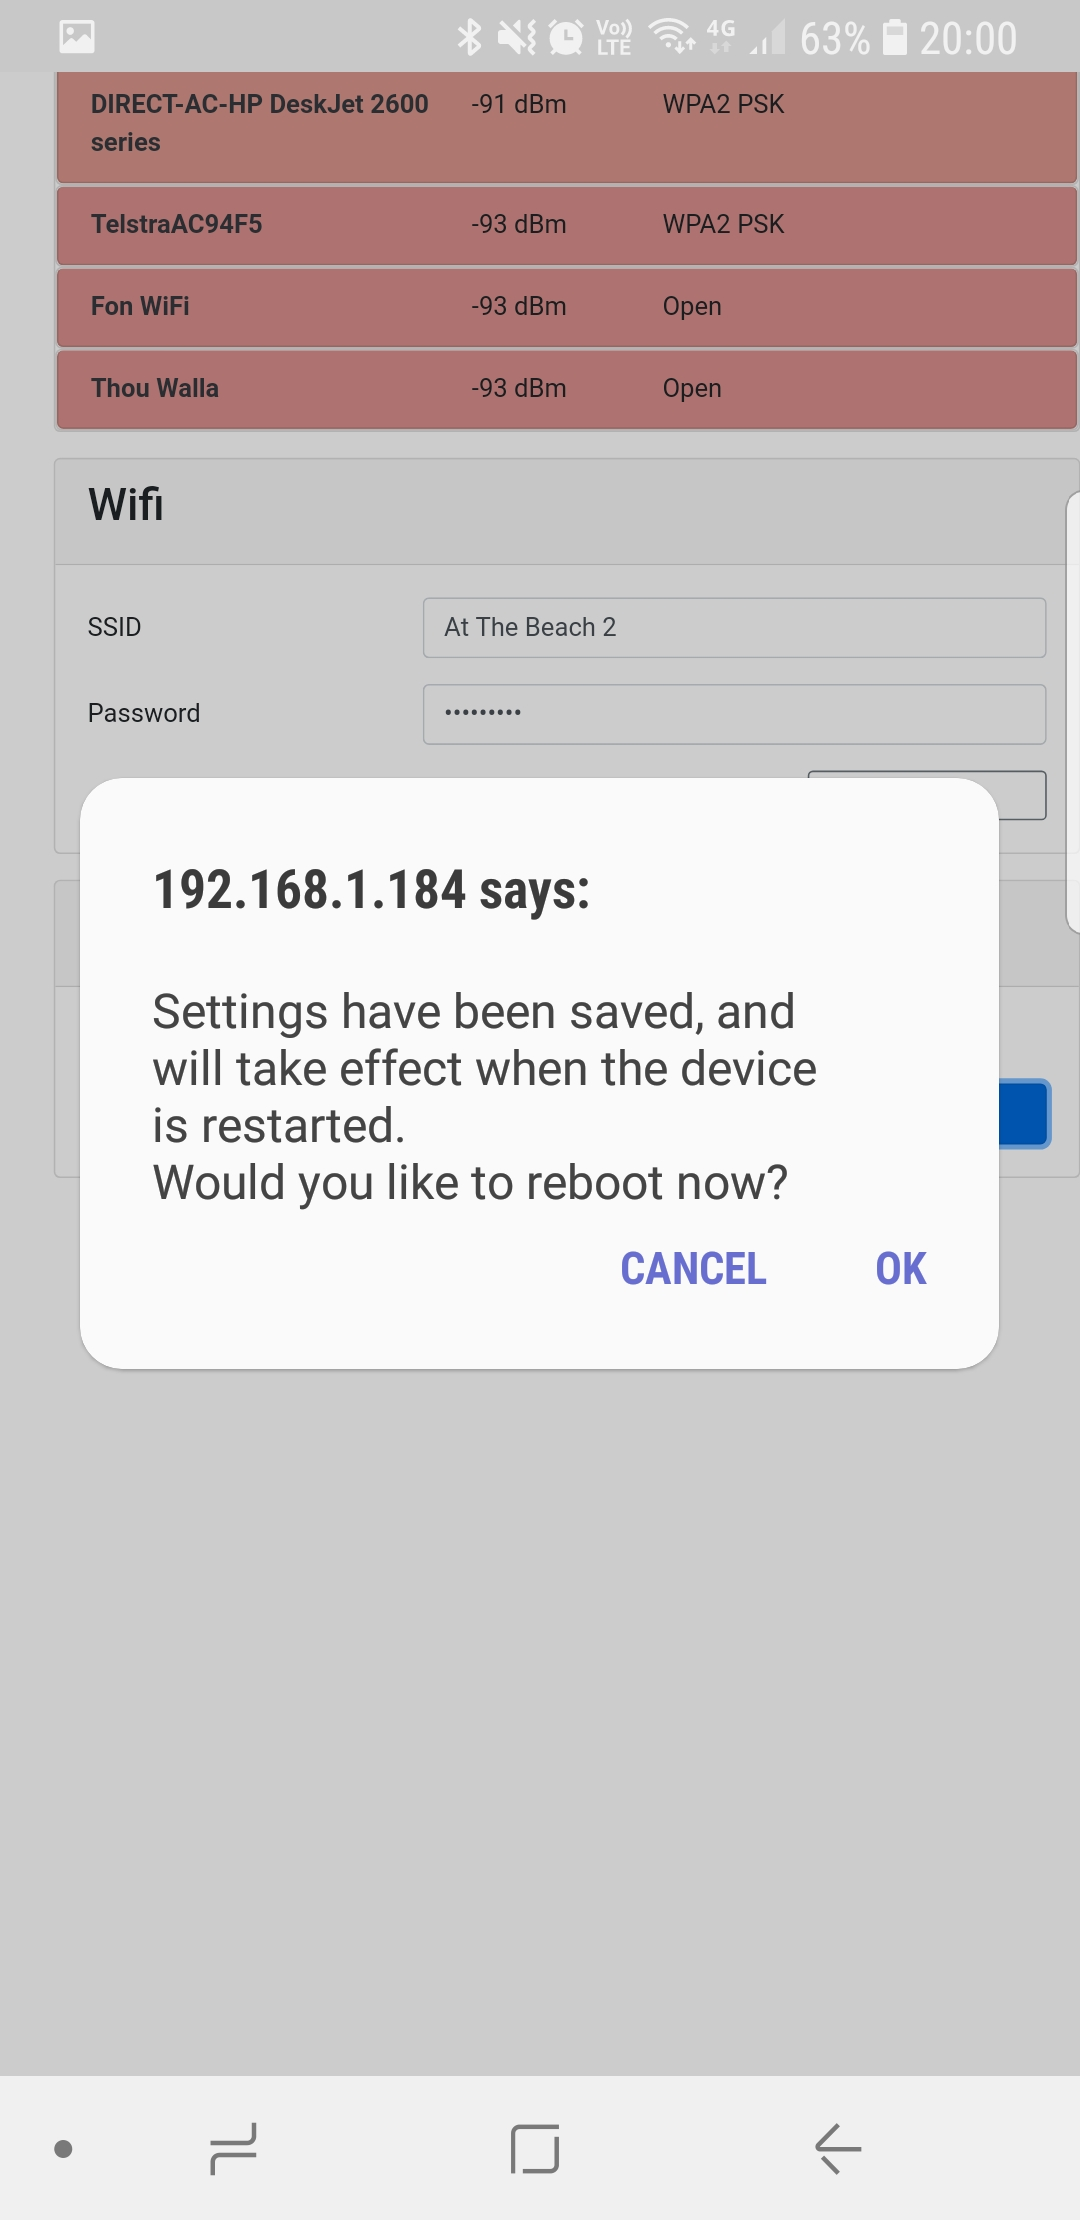
Save changes and reboot
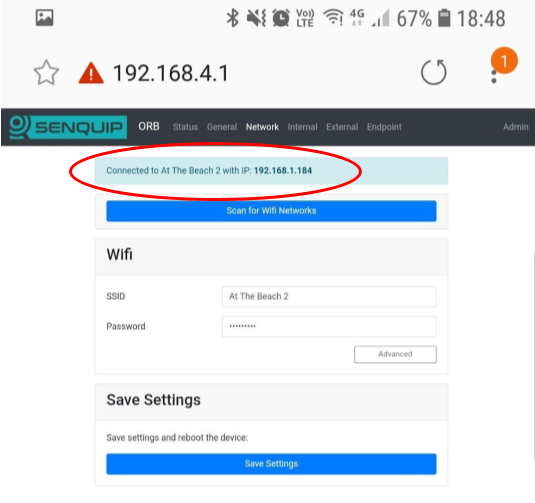
After a reboot, the ORB will attempt to connect to the specified Wi-Fi network. You can check if the ORB has successfully connected to the chosen network by placing the ORB in setup mode and returning to the Network page. At the top of the page, the current network status will be shown. Note the IP address that your Wi-Fi modem has allocated to the ORB; you can use this address to access the ORB directly on your WiFI network.
Note the IP address on your network
Further Wi-Fi settings are available by selecting the Advanced option. Once selected, a static IP address, netmask, gateway and DNS server can be specified.
The integrated web-server is normally only active in setup mode; it can however be made to be always on by setting the web setting to ON. This may be an advantage in systems where permanent power is available and the user wants to be able to make remote changes directly on the ORB without having to access the Senquip Portal. Keeping the web-server active will require that the ORB remain awake at all times but does mean that the user can make instant changes to settings and see the latest measured data.
Access via local IP
When connected to a Wi-Fi network, the ORB may need to be able to make outgoing connections to remote services. To allow the ORB to make connections, some ports need to be enabled for outgoing connections on your Wi-Fi network.
Function |
Port Number |
Description |
|---|---|---|
NTP Time |
123 |
To be able to correctly timestamp measured data and for certain encryption functions the ORB needs to know time accurately. Time is accessed by connecting to an NTP server on this port. |
MQTT to Senquip Portal |
8883 |
Secure communications with the Senquip Portal are established on this port. |
OTA update |
80, 443 |
Over the Air (OTA) is a method by which the ORB software can be remotely updated. To enable remote software upgrades of the ORB software, outgoing connections need to be enabled on this port. |
Note
If custom endpoints are enabled, additional ports may need to be opened.
The following Wi-Fi authentication modes are supported:
WPA
WPA2
WPA3
Wi-Fi Settings
A full list of Wi-Fi settings is given in the table at the end of the chapter.
Connecting to a mobile network
Once in setup mode, use the Network page to connect the Senquip ORB to a mobile network.
In most cases only an APN will be required to establish a 4G LTE connection. Some service providers will require a username and password and some SIM cards will require a pin. If these are not needed, leave them blank.
For CAT-1 devices, an additional Connection Mode setting is available. This setting allows the selection of 4G or 2G, 3G, 4G mobile technology. 4G offers higher bandwidth and is recommended unless there are initial connection issues.
A Roaming option is available for SIM cards that offer connection to networks other that SIM card home network.
RSSI |
Signal Strength |
Meaning |
|---|---|---|
0 |
-113dBm or less |
Signal strength poor |
1 |
-111dBm |
Signal strength poor |
2…30 |
-109… -53dBm |
Medium signal strength |
31 |
-51dBm or greater |
Signal strength excellent |
4G LTE Settings
A full list of 4G LTE settings is given in the table at the end of the chapter.
Network Settings
A full list of network settings is given in the table below.
Name |
Item |
Function |
Internal Reference |
|---|---|---|---|
Wi-Fi |
|||
Wifi |
boolean |
Connect to existing Wifi connection specified below. |
wifi.sta.enable |
SSID |
text |
Wifi SSID to connect to. |
wifi.sta.ssid |
Password |
password |
Wifi password to use for connection. |
wifi.sta.pass |
Static IP Address |
text |
Leave blank if assigned by DHCP. |
wifi.sta.ip |
Static Netmask |
text |
Leave blank if assigned by DHCP. |
wifi.sta.netmask |
Static Gateway |
text |
Leave blank if assigned by DHCP. |
wifi.sta.gw |
DNS Server |
text |
Leave blank if assigned by DHCP. |
wifi.sta.nameserver |
GSM |
|||
GSM |
boolean |
Enable the GSM connection. |
gsm.enable |
APN |
text |
Access Point Name of mobile operator |
gsm.apn |
Username |
text |
Username for data connection. Leave blank if not specified |
gsm.user |
Password |
text |
Password for data connection. Leave blank if not specified |
gsm.pass |
Connection Mode |
preset |
Select mobile technology (CAT-1 devices only) |
gsm.scan_mode |
Roaming |
boolean |
Enable network roaming |
gsm.roaming |