Operation
The user created script runs on the device every time the device boots. This includes waking from sleep.
Note
The total script size must be less than 20000 bytes
In order to process data as it’s collected by the device or to trigger events, a callback function can be registered by the script. These callback functions are then invoked when the device completes a measurement cycle, or a button is pressed from the Senquip Portal. See the Examples section for specific implementation details.

Scripting Window
Custom Data Parameters
Custom data parameters are configured for the device in the window under the script editor. The visibility, name and units for each custom parameter (cp) can be modified. A parameter’s value can be sent in a data message as either a number (using dispatch_double()) or a string (using dispatch_string()). See examples section.
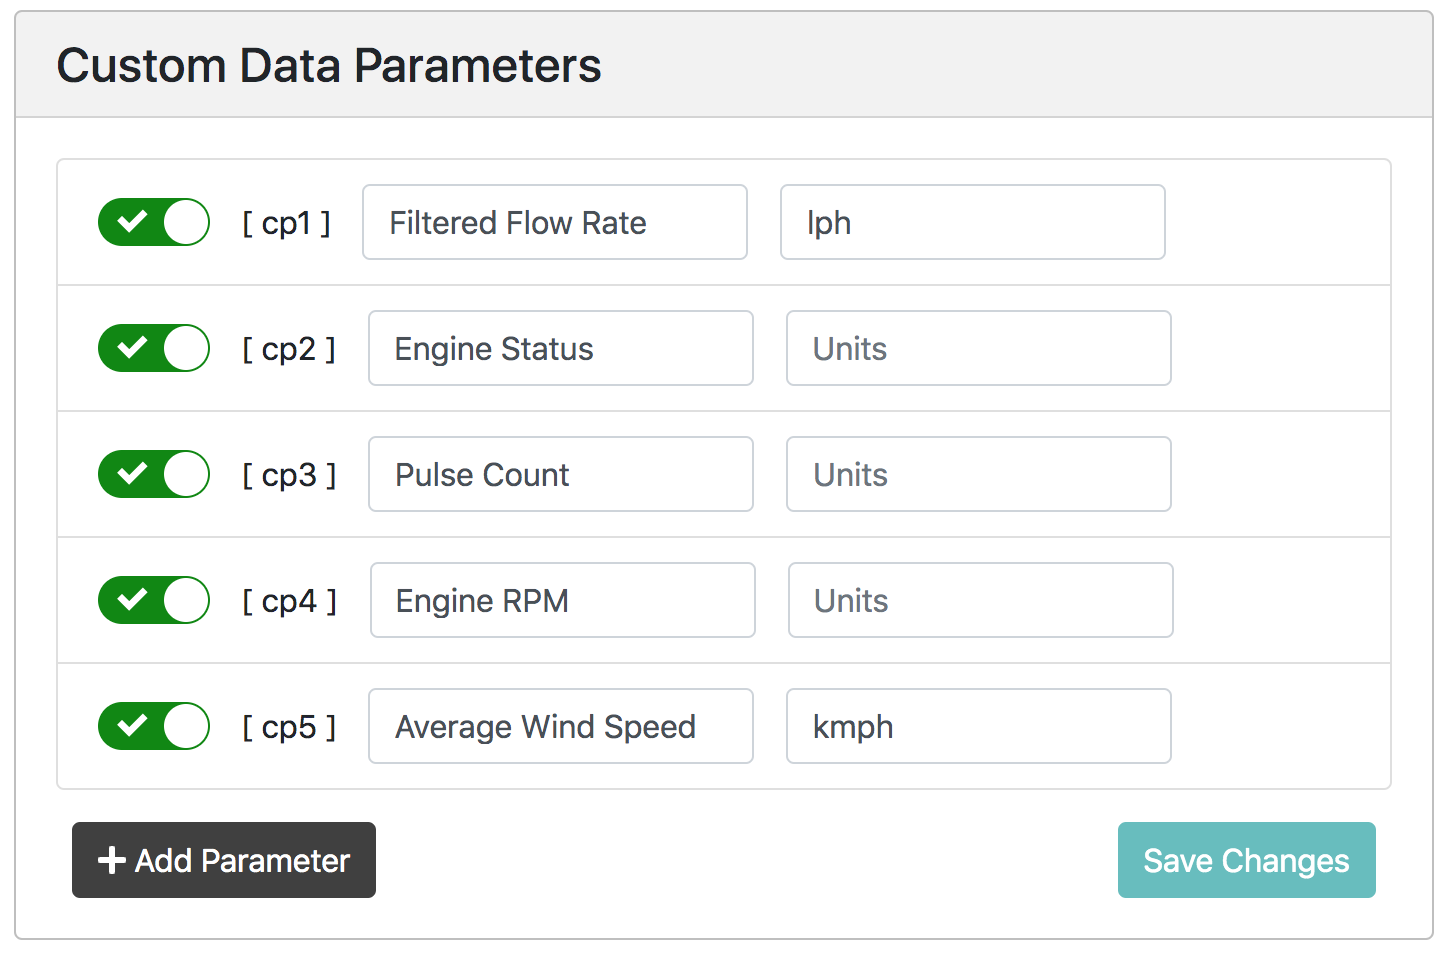
Setup of custom parameters
Trigger Parameters
Warning
Triggering actions on the device must not be used for safety critical applications. The system connected to the Senquip device must tolerate network delays and malfunction.
Each trigger parameter added will create a button on the main data page of the Senquip Portal. The name of the button and the colour can be customised. When a user clicks a button from the device’s home page, a command is queued and then sent to the device. When the device receives the command, a trigger callback function is invoked and the index of the trigger parameter is passed in. See examples section for specific details.
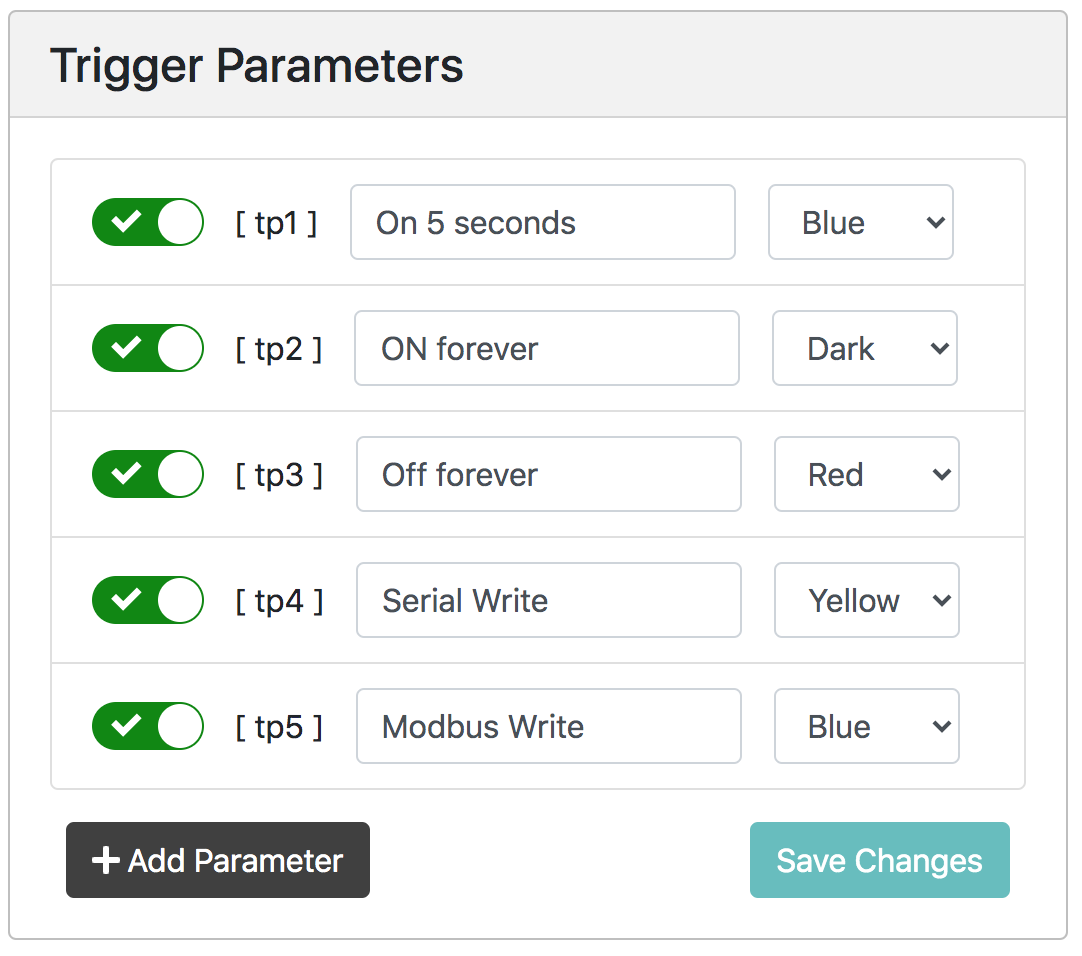
Setup of trigger parameters
Note
Triggering an action on the device does not provide feedback on the effect of the action. It is highly recommended the device is setup to monitor a physical parameter that will indicate if the trigger was successful or not. For example: if the trigger turns a pump on, monitor for changes in flow rate.
Custom Settings
Custom settings can be enabled for use by the script. These settings are permanently stored in the device’s FLASH memory like all other configuration values. Settings can either be a number or string type. The visibility, name and units for each custom setting can be modified from the Scripting page.
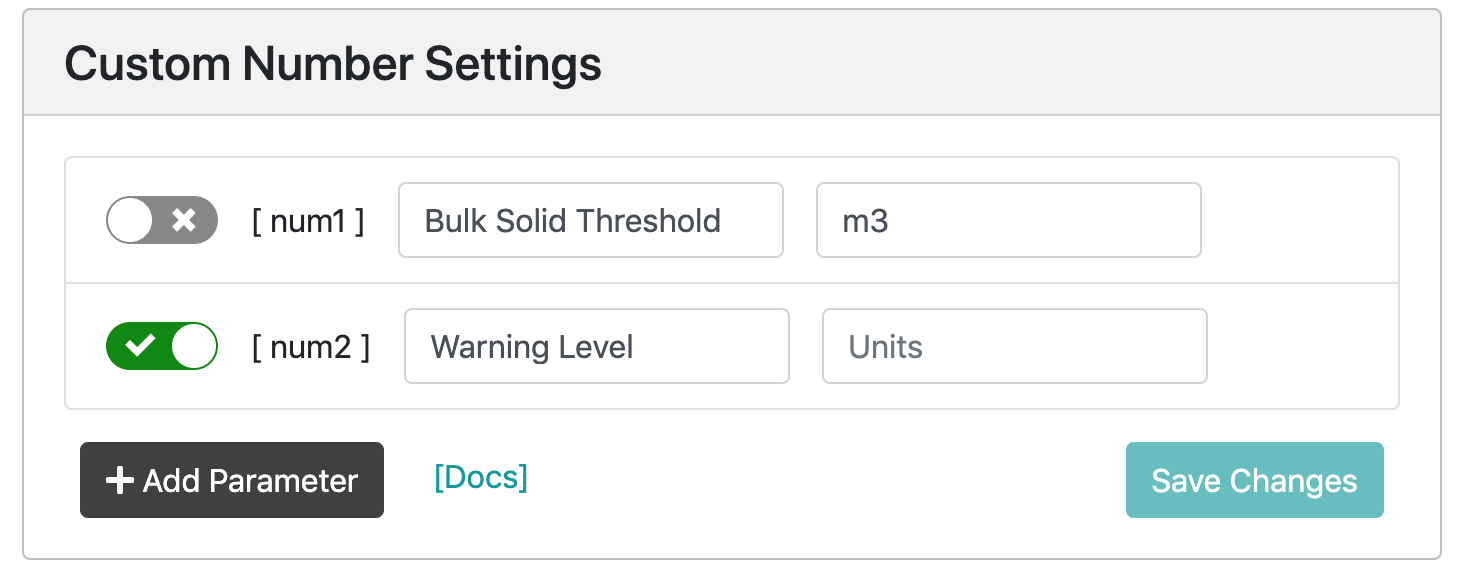
Setup of custom settings
Once settings have been configured and enabled from the Scripting page, they will show up under the device’s Setting page on the Custom tab.

Use of custom settings
Note
When a user applies a change from the Settings page it causes the device to reboot, and the script to run again.
Settings can be set and read from the script using the Cfg.set(path) and Cfg.get(path) function calls. See examples section for more detail.
Warning
Excessive use of Cfg.Set() from the script will wear internal FLASH memory. The FLASH memory can typically endure 100 000 write cycles.
States
A common requirement for monitoring applications is knowing what ‘state’ a machine is in. The concept of machine states is built into Senquip devices. From the current measurement data a script can work out what state the machine is in, and record it accordingly using a single function call.
There are six custom states which can be named and used as required, plus a fixed ‘Offline’ state (state0). The hours spent in each state flows into the standard data message, allowing utilisation information to be calculated by an endpoint/dashboard. The names for each state can be set from the Scripting page, however the state colours are fixed.
Note: the names for each state are Senquip Portal settings only, the device and script do not use the custom names.
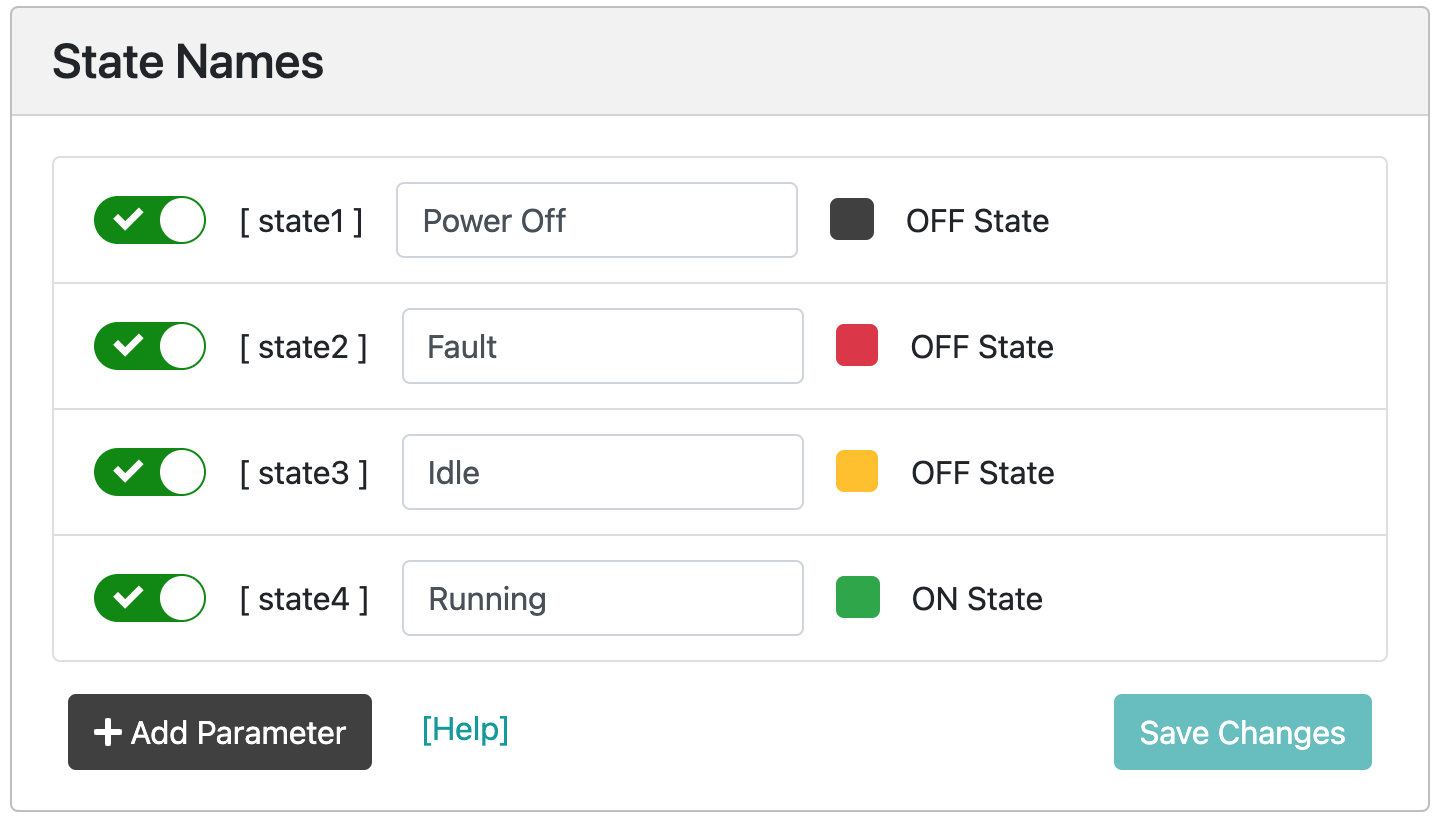
Setup of custom state names
The last three states (4, 5 & 6) are considered ‘On’ or ‘Working’ states for utilisation calculations. Not all states need to be used, it depends on the application. At least one ‘ON’ state should be used if valid utilisation data is required. Utilisation on the Senquip Portal is calculated as follows:

Utilisation Formula
The state can be set from the script using the SQ.set_state(x) function call. Where X is the new state number. The device automatically records the number of hours spent in each state.
The hours recorded for a state can be reset to zero from the script using the SQ.hourmeter_set() function call. See reference section for usage.
By default the device always starts in State 0 (Offline) on reset.